BroadLineRegions.jl
A fast and flexible toolkit for modeling the broad-line region (BLR) in Julia.
General Introduction and Motivation
One of the observational hallmarks of quasars/active galactic nuclei (AGN) is that they have extremely broad emission lines. The widths of these emission lines are so broad (often many thousands of km/s) that we assume they can only be created by fast rotation of line-emitting gas orbiting a supermassive black hole. Another key feature of AGN is that they are also variable in time, and these two facts present a unique opportunity to measure supermassive black hole masses directly in AGN:
\[M_{\rm{SMBH}} = f\frac{R\Delta V^2}{G}\]
The width of the line provides a natural proxy for $\Delta V$, and the variability of AGN allows for a time delay to be observed between the continuum assumed to originate in the accretion disk near the black hole and the broad-line region. This time delay then provides a natural estimate for the distance from the SMBH to the BLR, assuming these variations propagate at the speed of light, as $R\approx c\Delta t$. The BLR occupies the region between the accretion disk and the dusty torus within a "standard" active galactic nucleus (AGN), and is unique for these reasons as it is near enough the black hole to be rotating quite fast (to produce such broad profiles and have delays that are short enough to be measured with relatively small timescale observing campaigns) under the influence of mostly the mass of the supermassive black hole alone while simultaneously being far enough away that the gas is not completely ionized by the central source (or else no emission line could be produced) and such that relativistic effects are likely not too important such that we can use the simple formula for the mass above.
But one wrinkle remains in this simple equation for estimating the mass, which is the "Virial factor" $f$. $f$ encodes all of the unknown properties of the source related to its geometry and kinematics, and thus to obtain the most accurate value for $M$ we must assume some kind of model for the BLR. There are many possible models for the BLR that are used to try to reproduce all of the observational data products, and this is the motivation for BroadLineRegions.jl, which allows for fast and flexible dynamical modeling of the BLR through an open-source framework accessible to anyone. This kind of modeling allows us to not only better understand how to most accurately measure supermassive black hole masses across cosmic time but also enables a more fundamental understanding of the environment around supermassive black holes by better understanding the true nature of the geometry and kinematics of the BLR.
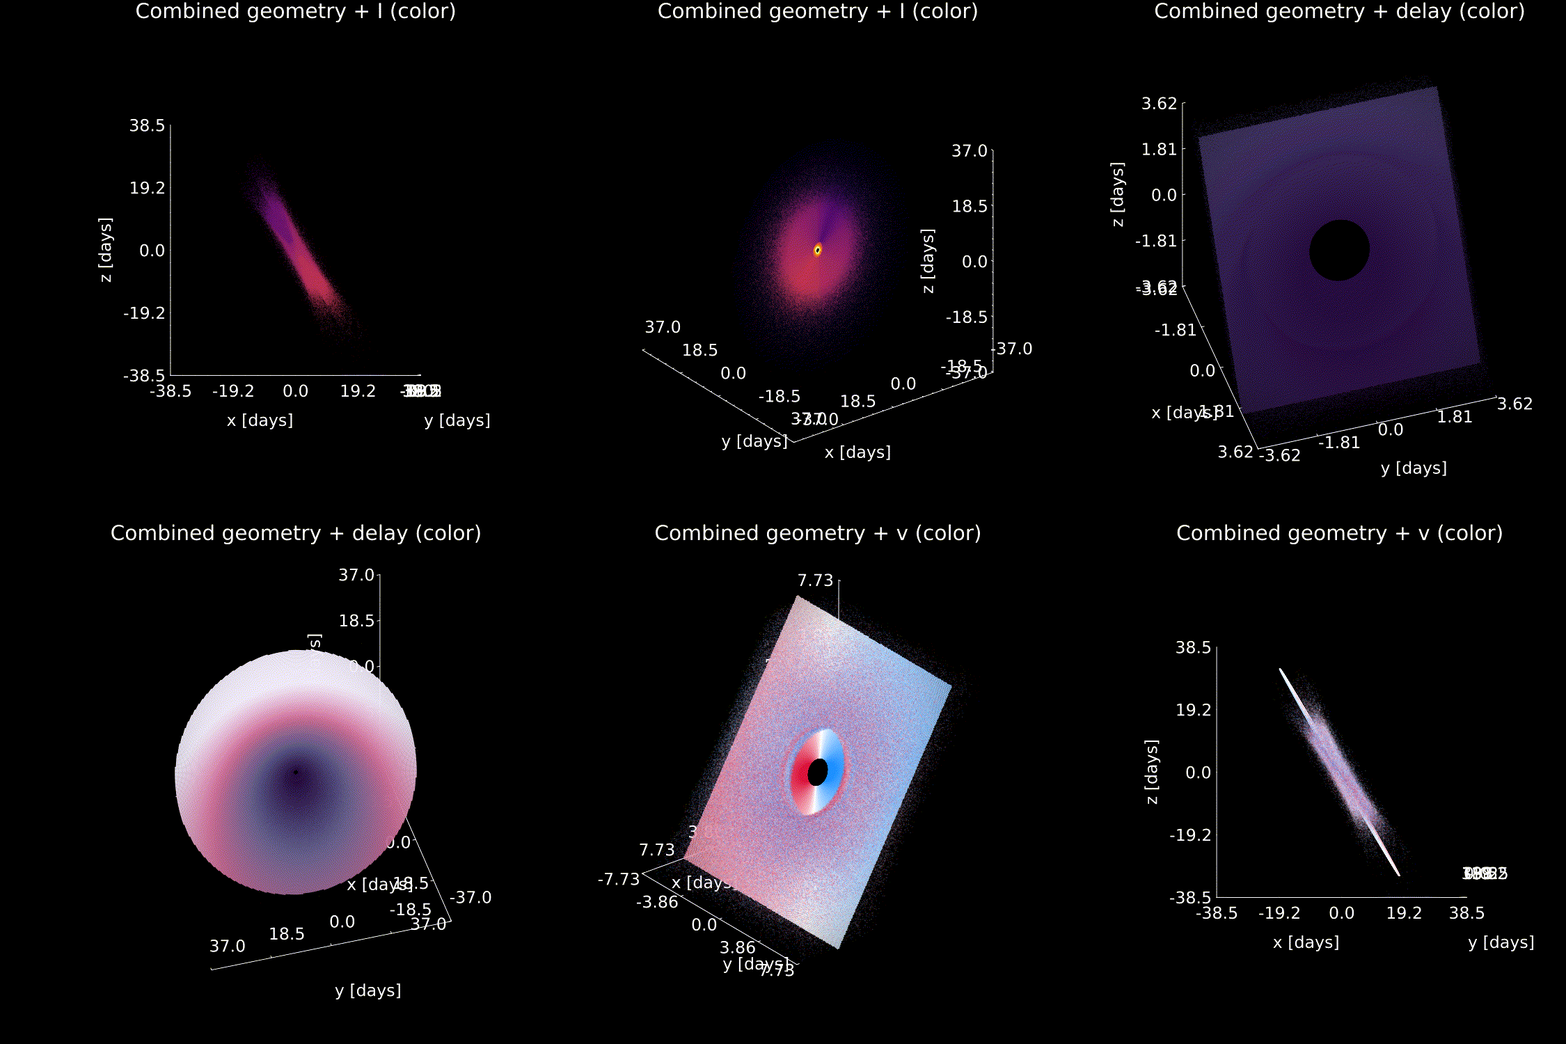
Below we show a few simple examples of how to generate different kinds of simple dynamical models of the BLR using BroadLineRegions.jl. More detailed usage examples are available in the full documentation.
Installation
Julia
using Pkg
Pkg.add("BroadLineRegions")
Or install from the GitHub repo directly:
using Pkg
Pkg.add(url="https://github.com/kirklong/BroadLineRegions.jl")
Python
To access BroadLineRegions.jl from within your Python installation, first you must install JuliaCall. After successfully installing JuliaCall you can add BroadLineRegions.jl to your new Julia installation in Python with:
from juliacall import Main as jl
from juliacall import Pkg as jlPkg
jlPkg.add("BroadLineRegions") #or use the github link
Quickstart
While this code is designed to be very flexible and modular such that you can implement your own bespoke models of the BLR easier, two popular models of the BLR are included as default models which one can play with.
To generate a "cloud" model similar to that of Pancoast+ 2011 and 2014, use syntax like:
using BroadLineRegions #exports itself as both BroadLineRegions and the shorter acronym BLR
mClouds = BLR.cloudModel(100_000,μ=500.,β=1.,F=0.5,θₒ=30/180*π,γ=1.,ξ=1.,i=0.,
        I=BLR.IsotropicIntensity,v=BLR.vCircularCloud,rescale=1e-5,τ=0.0)
To generate a "disk-wind" model similar to that of Chiang and Murray 1996 and 1997 following the prescription laid out in Long+ 2023 and 2025 use syntax like:
mDisk = BLR.DiskWindModel(500.,5.,1.,30/180*π,nr=24,nϕ=48,scale=:log,
        f1=1.0,f2=1.0,f3=1.0,f4=1.0,reflect=false,τ=5.)
In case you do not like unicode symbols, spelled out keyword aliases (for example mu, theta_o, and tau) are also available for all parameters (and can be mixed and matched with the unicode symbols), i.e. for the cloud model example above we could also write:
mClouds = BLR.cloudModel(100_000,mu=500.,beta=1.,F=0.5,theta_o=30/180*pi,gamma=1.,xi=1.,i=0.,
        I=BLR.IsotropicIntensity,v=BLR.vCircularCloud,rescale=1e-5,tau=0.0)
See each function's documentation (either online or in the REPL with i.e. ?BLR.cloudModel) for a list of all parameters, their defaults, and available spelled out ASCII keyword aliases. Note that the internal code still uses largely unicode names, so to access struct fields only the unicode versions are supported (i.e. only m.camera.α works, and m.camera.alpha will produce an error).
If you prefer to start from the geometric basis of one of these models but modify how some internal portion is calculated, you can pass your own custom functions to them to enable this functionality. For example if you wanted to generate a geometry similar to the DiskWindModel example above but with a custom intensity prescription you could write something like:
myCustomIntensityFx(;r) = 1./r
mDiskCustom = BLR.DiskWindModel(500.,5.,1.,30/180*π,nr=24,nϕ=48,scale=:log,
        I=myCustomIntensityFx)
The code is designed in such a way that by default coordinates are always in reference to a virtual "camera" imaging the system, and by default the inner Struct we use to hold these points is called a ring (which acts as a "ring" of points on an image, from which we "raytrace" back to physical space at construction). You can of course go beyond these default recipes and define fully custom models by passing your own "rings" and optionally your own "camera" system to the model, such that you can configure the code quite flexible while still being able to interface with existing models:
mCustom = BLR.model(myCustomRings,nothing,myCustomCamera,[1]) #a custom model with no profiles, a user-defined camera for raytracing/visualization, and with no submodelsAnd you can also define your own custom functions as overrides to the defaults used in any of the existing BroadLineRegions.jl models:
myIntensityFx(; r, level=1.0, kwargs...) = level/r #a simple custom intensity scaling like 1/r
mCustomDisk = BLR.DiskWindModel(500.,5.,1.,30/180*π,n4=24,n_phi=48,scale=:log,
        I=myIntensityFx,level=2.) #instead of using default DiskWindIntensity use custom myIntensityFx with level=2.
Note that BroadLineRegions.jl attempts to make sure you have correctly passed keyword arguments for functions, and will issue a warning if it detects a keyword argument that it does not know how to check. This warning would be issued in the above case, as level is not a parameter of any existing function. For custom callbacks, you can thus optionally register extra keywords to enable stricter validation and suppress this warning:
myIntensityFx(; r, level=1.0, kwargs...) = level/r #a simple custom intensity scaling like 1/r
BLR.acceptedKeywords(::typeof(myIntensity)) = (:level,)
Models can be combined simply by writing mCombined = m1 + m2. After combining, you can run quick occlusion/optical depth raytracing calculations through raytrace!, but note that this implementation is by default exceedingly rudimentary (no complicated radiative transfer is solved, instead emission is just added up proportionally to $e^{-\tau}$ at each point along a ray until it reaches a specified optical depth stopping point and after that it is assumed all remaining emission along the ray is blocked, and you must supply the expected $\tau$ and emission values when creating the submodels).
Generate profiles (i.e. line, phase, delay, or whatever else your heart desires) for models with syntax like:
m = mDisk #or mClouds, mCustom, or however you have set up your model
p = BLR.getProfile(m,:line) #generate line profile with default parameters
BLR.setProfile!(m,p) #optinally store the profile in model data structure
These profiles are just simple estimates using weighted sums (rectangular Riemann sum integral approximations only), so smooth profiles can depend highly on the number of points, especially in the case of discrete "cloud" models.
A few default visualization recipes exist as well:
profiles = BLR.profile(m) #plot all of the model's stored profiles
img = BLR.image(m,:I) #make an image of the model intensity, can pass any other parameter as well to "image" them
geometry = BLR.plot3d(m) #visualize the geometry of the system in a 3d plot, can also color points according to any parameter
Note that no functions are exported by default into the global namespace to prevent overlap with other modules, and you must prepend the module name to all methods to access them. BroadLineRegions.jl exports itself as both BroadLineRegions and BLR, so both of these prefixes are equivalent, i.e. BroadLineRegions.model == BLR.model. If adding this prefix annoys you, you can avoid this by specifying the functions you want added to the global namespace in your import/Using statement. For example:
using BLR: DiskWindModel, cloudModel
mDisk = DiskWindModel(parms...) #instead of BLR.DiskWindModel
For more detailed examples, see the Usage and Examples page.
Full documentation is available in the API section.
Also note that if you are using BroadLineRegions from within Python you will need to modify all the code examples with the corresponding name that you imported julia with, i.e. the simple cloud example in the quickstart above in Python would become:
from juliacall import Main as jl
import numpy as np
jl.seval("Using BroadLineRegions") #load BLR into Main

mClouds = jl.BLR.cloudModel(100_000,μ=500.,β=1.,F=0.5,θₒ=30/180*np.pi,γ=1.,ξ=1.,i=0.,
             I=jl.BLR.IsotropicIntensity,v=jl.BLR.vCircularCloud,rescale=1e-5,τ=0.0)
You may also consider starting Julia with a sysimage to improve performance (see pure Julia example here, and instructions for enabling the functionality in juliacall here).
Referencing
If you find this code useful in your work, please cite it as:
lorem ipsumContributing
If you would like to contribute to the package, please open a pull request on the GitHub. For bug reports and feature requests, please open an issue on the GitHub. Contributions should be done in their appropriate files— for example if you find yourself using a custom function often with the getProfile method and want to add it as a default for all users this should be done in the relevant profiles.jl file to maintain the organizational structure of the codebase. After making a change you can ensure you did not break any existing functionality by running the test suite with: julia --project=. -e 'using Pkg; Pkg.instantiate(); Pkg.test(). By default this performs only the CPU tests, but if you have access to a GPU set BLR_TEST_CUDA=1 and/or BLR_TEST_METAL=1 as environment variables before running the test suite. Appropriate LLM-assisted contributions are allowed— for reviews we require that authors write pull requests in their own langauge to demonstrate understanding of what the LLM has done, and be willing to be accountable for its actions, but do not require that contributed code itself be written by humans. If LLMs are used we also encourage the use of an "AI Ledger" that documents what has been done a nd why (an example of which can be found here).